Clinic Registration
1. Generating the Clinic Certificate
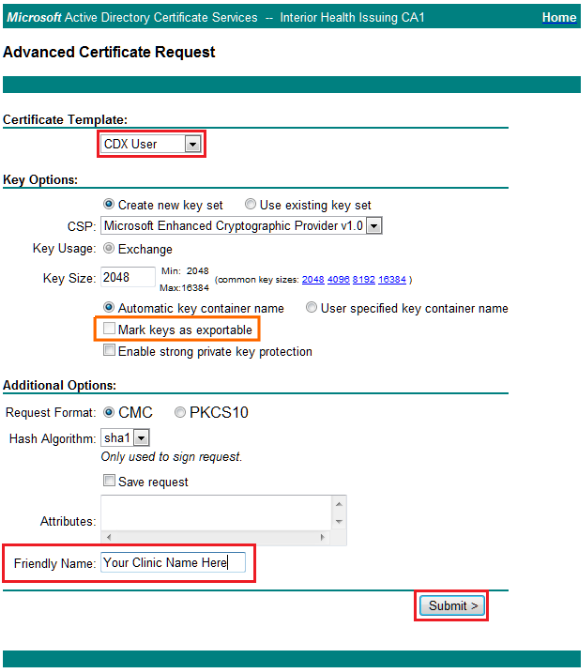
Generate the Clinic certificate as described in the “CDX Vendor Certificate Process.pdf” document (https://bccdx.ca/Documents/CDX%20Vendor%20Certificate%20Process.pdf)
In Key Options select the option Mark keys as exportable.
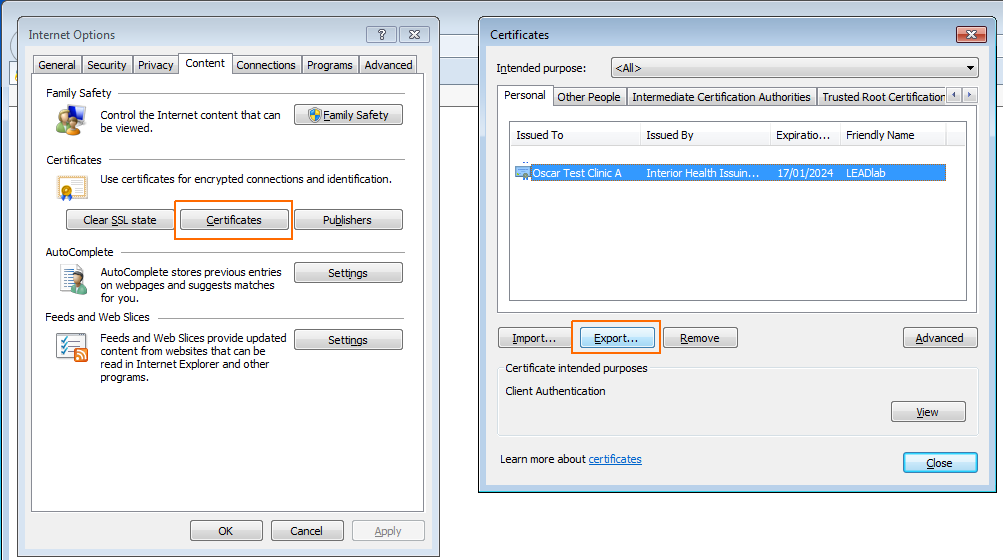
After generate the Clinic certificate, export the certificate using the Internet Explorer by selecting the issued certificate and following the Certificate Export Wizard.
When asked, select to export the private key, and select to include all certificates in the certification path if possible.
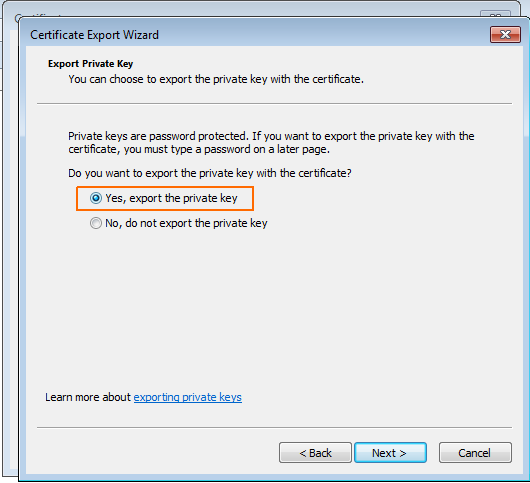

The exported .PFX certificate and password will be utilized by OBIB to communicate with the CDX servers.
2. Registering the Clinic in OBIB
Copy the Clinic certificate (PFX file) to the Vagrant’s shared folder.
Login into the OBIB’s VM via SSH:
$ vagrant ssh
Go to the Vagrant’s shared folder /vagrant:
$ cd /vagrant/
Execute the register script with the -r option:
$ ./register.sh
Usage: ./register.sh OPTION [VALUE]
Options:
    -r | --register   : register a new clinic
    -u | --unregister : unregister an existent clinic
    -c | --check      : check if a clinic is registered.
                        requires the clinic id as [VALUE]
    -h | --help       : this help information
The register option will create a new directory <clinic_id> with a properties file obibconnector.properties, a keystore obibconnector.keystore, and certificate files (<clinic_id>.crt, <clinic_id>.csr and <clinic_id>.key) for the registered clinic. This folder must be stored in a safe place, moreover the keystore and properties must be copied to the secure directory in the EMR system, which is specified in the mirth_connect.sh.
$ ./register.sh -r
Please, enter the clinic information.
 notes:
  - (*) refer to information provided or generated by CDX.
  - (+) refer to information related to the exported CDX Vendor Certificate.
  - (!) refer to new information required to generate the OBIB Connector Certificate.
  - (i) inform the last number of the Oscar Location ID for the new clinic.
Clinic ID (*): test_clinic_id
Clinic Name (*): Test Clinic Name
Clinic Username (*): clinic_username
Clinic Password (*): clinicPass
CDX Certificate Path (+): /path/to/TestClinicCertificate.pfx
CDX Certificate Password (+): TestClinicCertificatePassword
New OBIB Certificate Password (!): NewObibCertificatePassword
New Clinic Location ID (i): 1
Please, confirm the clinic information. "c" = confirm, "r" = redo, "q" = quit: c

Saving clinic information...

Verifying clinic registration...
Clinic registered.
Certificate file found.

Generating clinic cetificate for OBIB connector...
Generating a 2048 bit RSA private key
....................................................+++
.....+++
writing new private key to './test_clinic_id/test_clinic_id.key'
-----
Signature ok
subject=C = CA, O = OSP, OU = OBIB, CN = test_clinic_id
Getting CA Private Key
Certificate was added to keystore

The clinic certificate was created and imported into the OBIB keystore.
Please, move the generated directory 'test_clinic_id' to a secure place.

Customizing obibconnector.properties file...
Please, copy 'obibconnector.keystore' and 'obibconnector.properties' to the EMR secure directory '$CATALINA_HOME'.

$ ls
certs    deploy.sh          install.sh        README.md    test_clinic_id
configs  gen_obib_certs.sh  mirth_connect.sh  register.sh  Vagrantfile

$ ls test_clinic_id/
test_clinic_id.crt  test_clinic_id.key     obibconnector.properties
test_clinic_id.csr  obibconnector.keystore